Showing posts with label wire wrapping. Show all posts

Saturday, January 23, 2010

Wire Wrapping Books

I love craft books of any kind and will often look at one even if I don't actually do the craft just to see how they present a craft. I believe that if you are not a knitter (for instance) that if you want to buy a book and teach yourself how to that the book should include plenty of photos with the step. Maybe that is because I'm a visual learner. So, with that I would like to tell you about a couple of wire wrapping books that I think are well worth the price. The first one Jewelry Studio: Wire Wrapping which I have. I really love this book and had looked inside it several times at bead shops before I finally purchased it. The authors have included loads of step by step photos (YAY!) and very good written instructions alongside. They cover plenty of different design ideas from beginner to advanced.


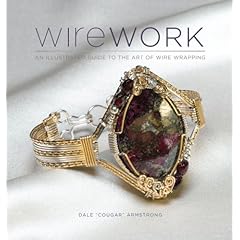
The second book I highly recommend is one on my wish list and I will definitely be buying this one as soon as I can afford it. It is Wirework: An Illustrated Guide to the Art of Wirewrapping by Dale "Cougar" Armstrong. If you are not familiar with Dale's work then you don't know what you are missing. I would LOVE to take one of her classes. I've thumbed through this book and as with the other she has plenty of projects from beginner to advanced and is thorough in her instructions and plenty of photos of all the steps. One of the other things I love about this book is that she includes photos of some of the finished projects by her students, their interpretation of her design. How cool is that?


Both books include all of the usual first chapter about all the tools and explanations of all of them and what you really need and what is helpful to have. I find this information useful when you compare what different wire workers use and prefer as far as tools. While mostly they use the same things and suggest the same tools for you to use there are always variations which I find very useful.

I've found that the one problem I have when doing any wire-wrapping project is how much wire to use. Both of these books help you to figure this out so you can work on projects and hopefully get the amount right. So if you are interested in wire wrapping check out both of these books.

Also, apologies for not posting in a while. Hope everyone is having a great 2010 so far.

Friday, November 20, 2009

Wired Again!

I'm skipping Favorites For Friday this week so I can post these new wire wrapped cabochons I've been working on. I finally got a pin vise, which if you didn't know, is this great little tiny hand sized vice. You slide your wire in and tighten it up and twist away. Square wire always looks cool when it has been twisted so I decided to do a few cabs with some twisted wire adornment. As always, I really don't know for sure what the stones are since they were slabs I got at the Gem & Mineral Society shop but I really likes them.

This second cabochon was wrapped using brass wire which is a tough wire to bend but I was very happy with how it turned out. Personally, I don't like too much wire to cover the actual cabochon since that is meant to be the focal point of the pendant. I prefer to keep it fairly simple and add any extra adornment around it. Although you do need to do some wrapping across in order to hold the cab in place.

I think I may have to keep the pin vice handy when I'm doing the wire wrapping since I just LOVE the outcome. Now, I just need to find something nice to hang them on.

I did make a really cool chainmaille pendant but my home-made lightbox got smashed in the move and so I'm trying to take the photos in real light. Didn't work on that one so I'll have to play around a bit more. Plus I have another cabochon which I wrapped with silver colored artistic wire that I want to take a few shots of. More of those later though. Hope everyone has a great weekend and if I don't stop by and say Hi than I hope everyone in the States has a great Thanksgiving!

Tuesday, July 7, 2009

Got My Mojo Back

Part of the problem, when I hit my "creative fork" in the road, was that I was having a B*t&# of a time trying to figure out how to wrap the cabochon in the above necklace. You see when I initially bought the seed beads I wanted to do a peyote wrap around it but it's actually a very big cabochon and it was so fiddly and, well, it just didn't work. Then I knew that I probably needed to do some kind of netting around it. My first attempt was to do four rows of netting around and to connect it but I soon realized that too was just not going to work. Frustration was seriously setting in and my friend Jennifer gave me good advice "set it down and forget about it". Well, I did put it down and started to go through all my old Bead & Button magazines in the hopes that something would jump out at me and lo and behold it did. I found a pattern for wrapping a button using netting and that was the answer. The pattern used only one row around to connect THEN do the rest to "capture" the cab. Yeah, I know, easy peasy right? Why didn't I think of that to begin with? I think I was so hell-bent on doing peyote at first that I wasn't able to see the woods for the trees. I should get a photo of the back since it actually is kinda pretty too but I wanted to at least show this off. By the way, the cab is one I made and is glass fused using dichroic glass to get that beautiful effect. The rope is a twisted herringbone which isn't very thick but does the job. When I finished this, I put it on to see how it looked and my husband says "It's kinda big isn't it....bold?" like that is some kind of bad thing....lol. The cab measures almost 3"/7cms across at it's widest point and is 1.5"/4cms tall, so yeah it is big but that was kind of the point!


The next piece uses more beads from Sorta Flowering Designs, they are their seeds called Karma. I wanted to do something that would not take away too much from the beads. Despite the fact that they are a smaller bead they are just gorgeous and the colors are so pretty. I ended up making waves with argentium silver wire and then adding the beads with Swarovski crystals in violet and aquamarine AB. I actually even made the clasp and hook on this one too. I have to admit that the wave sections were initially meant to be an 'S' section but I used a 2" piece of wire since it was already cut and the wave happened instead. Happy accident since I prefer this look.

So now that I'm not standing in the middle of the road anymore I shall continue to play. Planning on going to the SNGMS shop today and work on some more cabs to wire wrap. I have a rivoli that I have all wrapped but just can't find the right crystals to go with it, so that is one that I have put down and will get back to.

Also, thanks to all for the information about Artfire, I have now opened a shop there, one of the free accounts. So far, it looks like a great place and I'm really hoping it goes better over there. I do think they seem to be more attentive to what sellers AND buyers want from a site. I'll be putting up my Rapid Cart on my blog as soon as I get a few more items listed.

One last thing too, apologies to Jerri over at Gems By Jerri and Wiggy over at Wiggys Musings. Both tagged me and I have yet to get to them. Sadly my anxiety over not being able to figure out what to create overtook me. So thanks to both.

Sunday, March 29, 2009

I'm Wired!!


Not just wired on coffee! I've been taking a break from my chainmaille obsession and have been working on some wire-wrapping creations. The first photos is the cabochon that I made. If you aren't sure what I'm talking about then you can read this post here for the explanation. I know that a lot of people use square wire for their wrapped cabs but I had some 22 gauge round wire lying around so I just ended up buying some half-round wire from a seller on Etsy. I'm very happy with how it turned out considering this is my first ever attempt at wrapping a cab. Now if only someone could tell me what the stone IS then I'd be really happy.


Green aventurine is such a pretty stone and I love the way it looks combined with copper. I already have one pair of copper earrings with aventurine in my Etsy shop but these are slightly different. I'd like to do a pair like this in silver but maybe with garnets or lapis. Hmmm, or maybe I'll just have to make one pair of each.


This last photo is a cuff I came up with after seeing a design in Step by Step Wire Magazine. The original design had smaller "waves" but was along the same lines. This was fun to make since it was all very random as I went along. Lately too, I have been trying to make my own findings so the clasp on this cuff is handmade as well. One of the next projects I'd like to work on with wire is some hammering, so need to find the right time so I don't disturb the neighbors. I bought some 12 gauge wire which I'm chomping at the bit to play with. Uggg so many ideas, not enough time OR money! I'll be listing these in my shop soon so keep an eye out.